Brakes i try and stick with Brembo, they seem to be the best from all the ones I've tried on the race bikes, they do enough compounds that you can really fine tune what type of riding you're doing as well.
Pros: best, fine tune riding

Brakes i try and stick with Brembo, they seem to be the best from all the ones I've tried on the race bikes, they do enough compounds that you can really fine tune what type of riding you're doing as well.
I think I figured out why the brakes are so weird feeling. Even after I got them to firm up, they never really felt like I'm used to in my old STI or 911. I bought OBD11 to make some changes for track and had an ah ha moment. The last change to make was for hydraulic brake assist, but I couldn't get it to work in OBD11 because I didn't have the correct security code. Took a couple of days to find it, but I drove around with the other changes and brakes felt the same. I finally found the code and deactivated Hydraulic brake assistance in the 03 module and they brakes actually work like a normal car now. Holy cow, night and day difference.
Yep, got them on yesterday. Pretorias will need 15mm spacer, not 10mm as I originally measured. They feel so much better than PP. So easy to modulate. Worth every penny.
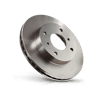
For daily use, go for brembo blanks on your rotors. Oem pads are great for that initial bite but HORRIBLE on dust. I would go for akebono ceramic pads. They need a little more time to be warmed up but they’re great imo. Hardly any dust, super quiet, and they do just fine on my occasional canyon runs.
This years projects are all done.. finally got the rear big brakes finished and they came out great.. a lot of work but, brake pedal feel is just as good as with the fronts only, and this thing will make your teeth fly out when you put them down.
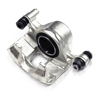
Since I had never powder coated anything before, a friend donated to me a really crusty audi rear parking brake caliper to test with! Here are the trial steps of the process: First layer of Super Chrome: Second layer of Prismatic Soft Red Candy: I was pretty satisfied with the finish on this test caliper and noted a few things I had to do better, which were cleaning the calipers more thoroughly and being more consistant with the application of each coat. Time for the big ones! I was SUPER nervous doing these: Here's the caliper all prepped and ready. I used the original dust boots, this time with some high-temp tape to mask the piston bores. I also made some mounting brackets to hold the caliper up using some L-shaped pieces of steel I found at Home Depot in the electrical section. You can see the little Faraday cage areas near the pad retaining pin boss. There were a few select areas that I just could not get a decent amount of powder to stick, but ultimately it flowed out well and looked fairly consistent. This is where I started baking. Flowing out! this was extremely cool to watch and turned out really shiny. Next step was the Soft Candy Red. This caliper was so insulated by the super chrome base that I HAD to hot flock it. With the use of the headlight, it turned out quite well - I had later decided to do something special with the logo - I was pretty drawn to the brembo logo that can be found on bike calipers and calipers that have been heavily machined - it looks to me like a tool path for a ball-nose end-mill made to cut the brembo logo into the caliper, and the directional arrow on these calipers I thought was a really cool touch, so I made a vector file in illustrator and had a friend cut me some stencils so I could spray-paint the logo on instead of use a traditional vinyl decal. I ended up liking this logo a lot more! Here is one of the loaded calipers with the stock rear calipers coated as well. These were very tedious to disassemble and require snap ring pliers to be modified in order to remove the parking brake adjuster and seal deep inside the caliper: And of course, the final product! Installed on the car - Some closing thoughts: The braking performance now is just night and day. It's extremely smooth and is super confidence inspiring, the pedal feel is very linear and when you need to stop, the car will absolutely stop. It's one of those things that must be experienced to know the true difference. I am using the stock master cylinder in my car and with the braided lines, I have noticed no difference in pedal droop or mushy pedal. It feels as stiff as the MK7's stock brakes but stops the car so fast it feels like you hit a wall. Overall, these are absolutely wonderful budget big brakes and I can't explain how happy they make me. I receive compliments everywhere I go and the driving feel improvement is fantastic - in my opinion one of the best modifications you can do to your car. Bleeding brakes is very easy as well, simply follow the bleeding procedure for your vehicle (The MK5 is different, iirc it starts with the caliper closest to the ABS pump). You really only need to use one of the bleeders and you definitely need to use either VAG-COM or OBDEleven to cycle the ABS pump a few times to work bubbles lose. I highly recommend OBDEleven if you have an android phone for other utilities as well. Concerning the brake rotors, if you go 17Z or 18Z route I highly highly recommend going with the ECS 2-piece rotors, firstly for weight and comfort (crashes harder over bumps with heavier rotors and more unsprung mass), secondly for rotor alignment (The GL450 rotors sit ever so slightly off center between the caliper inside surfaces) and third, the Brembo 18z pads are a bit larger and protrude past the inner diameter of the planar rotor surface. As time goes on, the very ends of the bottoms of the pads will develop a chamfer that makes it more difficult to remove when replacing the pads. It traps the pads a bit. The ECS floating rotors are wide enough to allow the entire pad surface area to sit on the planar rotor surface so that would also not be an issue. There are other floating rotors available at higher prices, so ultimately the choice is yours. As I said I've been using these spiritedly for 8 months so far and they've been fantastic. Here's a shot of them from a few days ago! Thanks so much for following along guys and please ask me anything about adding these to your car if you so choose! Cheers!
So I've had some DIY salvage yard 18zs on my car for about 8 months so far and they are incredible. The calipers I purchased from car-part.com and Ebay. The shipper from car-part lost one of the calipers in the mail, so definitely be weary of buying stuff from car-part, but it is cheap and the caliper was extremely solid. Calipers - Brembo 18ZL and ZR, totaling approx. $360 shipped. Rotors - Mercedes GL450 rotors, get them in any flavor you want. DB-35091 From Brake Performance were mine. Lines - StopTech Braided Stainless Lines - PN 950.33013 Mounting Hardware - ECS Stage 4/5 Mounting Hardware - PN 009759ECS01KT Rebuild Kit - 30mm/34mm/38mm Stoptech/Brembo Front Brake Caliper Rebuild Kits (Qty 2) 18Z - Ebay Item # 263562711094 (I had been sent one wrong dust boot and they quickly sent me a full second set, Ohio Performance Solutions was definitely a pleasure to deal with) Pads - Brembo ceramic brake pads P/N 7L0698151P Pad Hardware Kit - https://audibbkparts.bigcartel.com/product/brembo-17z-18z-caliper-hardware-kit (You can also shine up the hardware that comes on your brakes, but I wanted some nice new hardware) Hub Centric Rings - Vw Golf Mk5 GTI Hub Centric Aluminium Rings 65.1mm to 67mm when using GL450 Disc - Ebay item #111392994828 ***WILL NEED SPACERS! Your stock wheels will not fit under these brakes! I am using VMR V710 18x8.5 ET45 wheels and the 18zs fit under these wheels without any spacer needed. I cannot guarantee your wheel will fit! ECS tuning has a great sizing template for their stage 4 BBK to check if your wheels will work.*** Other items not required but definitely help: Upgraded Aluminum Lower Control Arm Kit - With ECS Polyurethane Bushings - PN 017047ECS01-02 These allow for caliper clearance with the control arm at full lock. The standard welded steel arms we have on the MK5/6 are quite tall and will hit the lower part of the caliper at full lock. Simply grind a bit off of the control arm if you'd rather not do the aluminum arms, but they are a great upgrade! So here was the first caliper I received. The first think you will notice (and I still haven't quite gotten used to this) how absolutely massive these calipers are. For what they are, a cheap BBK, these are works of art. Die-cast, anodized and painted silver with six pistons 30/34/38 mm in diameter featuring phenolic caps that insulate the pistons and brake fluid from rotor heat. I can say after some decently hard runs on Angeles Crest Highway in CA, the calipers don't even heat up. It's very weird, they're always room temperature unless you're actually lapping a track all day. (Fist for size comparison) These calipers aren't heavy, either. They are comparable in weight to the original GTI calipers, and definitely lighter unloaded. The rotor is what gets you, weighing in at 29.5lbs, up from the 18 lbs of the standard GTI rotors. That's quite a bit, which is why I highly recommend purchasing the ECS floating 2-piece rotors from the stage 4/5 kit given that they weigh the same as our standard rotors. There are a few other reasons I highly recommend these which I will mention down the road. Here was the first mockup test under my wheels over the standard rotors, which in comparison are tiny. These were mounted with the ECS Stage 4/5 brake hardware kit. You will notice just how wide these calipers are, it's a bit ridiculous. I have about 2mm of caliper-to-wheel clearance, which for the past 8 months has been perfect with no contact to the wheels. I was convinced this would be fine when I visited a Subaru dealership, looked at a brand new STI with 6-pot brembos, and noticed the caliper-to-wheel clearance was seemingly less than my current setup. I had no calipers to measure, but they were VERY close to the wheels. Even though there's a recommendation of at least 3mm spoke-to-caliper, I have found that where I'm at with these calipers is just fine. Keep an eye on your wheel bearings of course. The first order of business for me was stripping the calipers, because I had decided after months of agonizing that I wanted to try powdercoating. I'm very stubborn as well, so I decided for about $400 I could have a bit of amateur powdercoating equipment and do both my front and rear calipers and be in some sort of control of the quality. This is by no means a professional job, but I really can't say that they look bad at all. I quite like how they look and it's far better and more glossy, candy-like than anything I've ever painted before. Info about painting vs. powdercoating I spent about two months fighting with myself, reading forums, asking opinions and going back and forth on what exactly to do and how to make these look great. Here is what I have learned thus-far: Painting via rattlecan: This is a really, really cheap and pretty good looking way to color calipers. The huge benefit is that it is SUPER HARD to strip powdercoat, whereas stripping paint is very, very easy. Be careful, though, because the colors and finishes that you may want will likely be fragile if exposed to brake fluid. I had done a few tests with duplicolor metalcast and crystal acrylic clear, and brake fluid ate it straight off. It does not hold up to Dot4, no matter what the manufacturer tells you. Painting via G2 caliper paint: If you want your DIY job to reek of DIY, try brushing but realize on calipers this big, brush-painting them is a constant losing battle. The first time I tried it, it looked like pure garbage, something like an arts-and-crafts project from preschool. If you go with G2, thin it and spray it through a gun, because that is the only way to rival powder coat or other nice painted finishes. The reason why I think G2 is still a good option is because of its durability and temperature resistance. When heating the spray-bomb metalcast paint in the color that I desired in the oven, the deep metallic red surface finish on my test piece quickly turned to a very burnt looking orange around 200 degrees surface temperature. I can say that without a doubt, G2 is probably the best option if you want to use the crap out of these calipers at the track. It was really, really hard to strip this stuff off the caliper after my failed brush-attempt. I can also say that it will be around $150-$200 dollars at least in paint for a whole set of brakes, because G2 is expensive and these calipers are huge. If you want decent coverage you will definitely need to make sure you have enough. I used two kits on my standard 944 brakes a few years ago and (at least on cast iron) the finish sort of didn't last to well, so keep in mind surface prep and thick coverage is very important with this paint. Color selection is pretty limited with G2 and if you want a custom color match, the price goes up astronomically Automotive paint: This is an affordable way to get an extremely nice finish if you don't plan on abusing the crap out of your brakes and getting them really hot. You also do not have to compromise the factory anodizing that is undern
The pedal feels f*ckin awesome, and holy **** do these things stop.
I have the R56S brakes on my R53, and I've had Brembo ceramic pads and cross-drilled rotors since I installed the calipers a little over a year ago. I'd recommend the pads, although I can't comment on how much they dust, because I have white wheels and any dust on them seems like a lot. The drilled rotors look awesome and perform really well, but my issue is that they have slightly warped since I put them on last year. If you decide to go the Brembo route, I'd probably recommend doing the slotted rotors instead of the drilled to prevent the warping.
Jeez I paid $350 for my brembos to be rebuilt, plus an extra 50 to have the scratches filed out that I made trying to get the pistons out myself :x
Write your review
Help others - share your experience with this part.
Voted AGAINST engine oil RAVENOL on the rating page
The brake pads NIPPARTS got the first review!
The brake discs Mintex got the first review!
The brake fluid DIXCEL got the first review!
For wiper blades PIAA already 100 reviews.
For battery Energizer already 25 reviews.
For headlights OEM Volkswagen already 50 reviews.
In the rating best brake caliper already 8 brands participate!
In the rating best clutch kit already 4 brands participate!
In the rating best fog lights already 3 brands participate!
In the auto rating headlights for Volkswagen Golf already 5 brands participate!
In the auto rating wiper blades for Ford Fusion already 10 brands participate!
In the auto rating brake discs for Volkswagen Golf already 5 brands participate!
Voted AGAINST engine oil RED LINE on the rating page
Voted AGAINST engine oil PENNZOIL on the rating page